Pages

Saturday, October 29, 2011

Semi-homemade Chicken Korma Empanadas


What do you do on the metro?  Any form of public transportation really?  1st: do you wear headphones - yes or no? 2nd: do you read a book, newspaper or magazine? 3rd: do you play with your blackberry or iPhone? 4th: do you people watch...blatantly?  I mean shoot, I am writing this on my iPod touch right now, headphones in, completely rocking out and tuning everyone out around me, on my way to meet Kathryn for dinner. (Aka grilled cheese and tomato soup.  Did I mention it is starting to get cold in DC? Like serious chill in the air some days.)  By the way I totally love her random surprise visits! 

Okay so this week has been filled with lunches that involved these delicious empanadas served with a side of roasted greens beans and okra.  I was totally like a little kid in the grocery store this past Sunday when I saw that Harris Teeter had fresh okra.  I got so excited!  So, these empanadas are my attempt at a Latin-Indian Fusion.  They reheat amazingly in a toaster oven set to 325 degrees F for 15 minutes.  Delicious!  Give them a try because they are super easy and the crust stays super flakey even after four days.  Any who enjoy and happy weekend!

Wednesday, October 26, 2011

Go Pirates! Vanilla White Chocolate Cakeballs


So its fall and well part of my fall is ECU football and I have really been missing out this year.  Lucky for me they had an away game that was practically in my backyard.  Well, by my backyard I mean 30-45 minutes away in Annapolis against Navy.  Hey that is totally still close!  Anywho for this game I made purple and cold "funfetti" cake balls with white chocolate and used purple and gold frosting to decorate.  I must admit they were not the best cake balls I have made.  Why does white chocolate have to burn so easily?  Basically the problem was that I was so worried about burning the white chocolate, that I ended up with too thick of a white chocolate coating on the cake balls.  The inside is delicious though, promise! 

Oh and we won!  Our quarterback even set records, which totally made up for us freezing our butts off during tailgating and the game.  Then again, what better way is there to spend a fall Saturday than chowing down on homemade pop tarts(Thomas they were awesome!), playing cornhole and drinking beer with friends?   


And then there was the football game.  GO PIRATES!  So, I made the cake balls of course...but, well I made pasta salad too, but this is a blog about baking not cooking pasta salad.

Monday, October 24, 2011

Mini Pumpkin Pies with Streusel


The other day I was trying to think about how I would describe my style if someone who didn't know me asked.  You see the thing is, it's different everyday, based on my mood, where I am going and what I am doing.  Sometimes my southern side comes out and I seek comfort in pastels and patchwork.  Whereas on other days, I find refuge in a slightly more hipster look with skinny jeans and a tank top.  Then there are the work days where I dawn a pair of high heels and want to look super professional, this generally involves wearing black.  Am I crazy?  Do you do this to?  Sometimes I just like a little change.  Some how my Monday night TV lineup totally matches this; I go from being in New York City (Gossip Girl) to in Deep South Alabama (Hart of Dixie).

Okay on to the pies.  This is actually the second time I have used this recipe and both times I was making these for the same person's birthday.  Happy Birthday Erik!  So, the filling turns out not too sweet and is slightly fluffy from the egg whites.  The streusel topping takes these mini pumpkin pies up a notch.  Also, these travel well, as both times they have been made, they have been taken on an airplane, once to Dallas and this time to Chicago.  Thanks Shanan for carrying these!  I am definitely going to make these again for Thanksgiving this year!  I think I am going to just make a bunch of mini pies...ps getting so excited for Thanksgiving!  Any who, try these, they are delicious!


Pumpkin and sweetened condensed milk with spices.

Wednesday, October 19, 2011

Apple Pie Cake


"Move over apple pie, because mama has found a way to elevate an American classic!" - JG

This week was/is...
...discovering my computer was missing two screws in the back...
....not paying attention while baking, oops, I was tired...
...a surprise visit by an awesome friend...
....going to Philadelphia for the day on the train...

This cake was...
....well some might say it competes with a pie...
...gone in 3 hours...
...amazing warmed in the microwave for 10-15 seconds...
...eaten as breakfast...do it, pie cake for breakfast = yum!...

Life is...
...up and down and all around...
(fyi running helps with this, whether it takes your mind off of things or lets you think more clearly)

...but the best print I have read recently about life is below...

What do you think?  

Okay apple pie cake time! Can I just say it really was delicious!  I mean I am a bit biased, because cinnamon appley desserts and I have a thing.  And by a thing, I mean apple desserts are some of my favorites.  Then again, it might just all go back to my love of cinnamon.  Either way try this cake pie; it won't let you down and would be absolutely delicious for dessert at Thanksgiving.


"Cake crust", press up sides of springform pan so it is one inch up the side.


Just out of the oven.  Smells so good!


Apple Pie Cake: (adapted from Martha Stewart)
2 cups flour
1 cup light brown sugar
3 heaping teaspoons cinnamon
1/8 teaspoon nutmeg
3/4 cup (1 1/2 sticks) cold unsalted butter, cut into pieces
9 - 10 apples (red & green), peeled and sliced
2 tablespoons fresh lemon juice

1.  In a large mixing bowl, combine flour, brown sugar, 2 teaspoons cinnamon and nutmeg.  Using an electric mixer, cut in the butter until the mixture forms pea-size pieces. 

2.  Press 2/3 of the mixture onto bottom and 1 inch up the side of a 9 inch springform pan

3.  Preheat oven to 350 degrees F.  Peel apples, cut into thin slices and place in bowl.  Toss apples with remaining 1 tablespoon of cinnamon and lemon juice.

4.  Place apples in the prepared pan on top of "cake crust" and press down gently to pack them.  They may mound over the top of the pan, don't worry they will cook down.  Sprinkle with remaining crumb mixture.

5.  Place the pan on an aluminum foil lined baking sheet and bake for 1 hour and 5 minutes or until golden brown on top.  Remove from oven and run a knife around the edge of the pan.  Let the cake cool in the pan to set.  Enjoy!


Monday, October 17, 2011

Apple Pie Pancakes


This is my kind of fall morning breakfast, and since my dad was in town I had the perfect excuse to make these.  Plus, after a bike ride Saturday morning and walking all over Mount Vernon we deserved pancakes and a relaxing morning.  By the way pancakes are so easy, all you need is the standard recipe then you just add whatever you want.  These just smell and taste of fall, plus I made them a bit more healthy by using applesauce to replace the oil and soy milk instead of regular milk.  So here's what you do, you invite a friend or two over for breakfast, you make a big pot of coffee, maybe even pop open a bottle of champagne to make some mimosas, and you make these pancakes and just relax.  We have all seriously got to make more time to relax and just catchup with friends and family.  Work will still be there Monday morning, trust me.   


Waiting for all of the bubbles to start popping, then they are ready to turn.


Just another minute and they will be ready to eat!


This might just sum up my fall; LOTS and LOTS of APPLES and pumpkin beer...well anything pumpkin really.  Oh and I definitely need some more apple cider in my life.  What is it about fall that makes me want to take put on a comfy sweater, some jeans and go for a walk to kick around some leaves.

Apple Pie Pancakes:
1 cup flour
3 teaspoons baking powder
1 heaping teaspoon cinnamon
1/8 teaspoon nutmeg
1/4 teaspoon salt
2 tablespoons applesauce (if you don't have have applesauce substitute with canola oil)
1 tablespoon brown sugar
1/4 cup egg beaters (or one egg)
1 cup soy milk
1 apple, peeled and chopped

1.  In a medium mixing bowl, whisk together flour, baking powder, cinnamon, nutmeg and salt.

2.  In a separate mixing bowl, whisk together applesauce, brown sugar, egg beaters and soy milk.  Whisk wet ingredients into dry ingredients, just until combined.

3.  Preheat pancake pan or heavy skillet.  While heating, peel and chop one apple.  Fold apple into the pancake batter.

4.  Spray heated pan with non-stick cooking spray.  Using a 1/4 cup dry measuring scoop, scoop pancake batter and pour on to pan until the pancakes are about 4-5 inches in diameter.  Cook for 2 minutes or until tops are covered with bubbles and edges look cooked. Carefully turn pancakes over; cook 1 minute or until bottoms are lightly browned.  Enjoy!   If you can't eat all of them they will freeze well.

Thursday, October 13, 2011

Gluten-Free Pumpkin Granola


Happy work week!  Well tomorrow is Friday, thank goodness!  This week was...birthday cake...strawberry infused vodka...granola...and hopefully some sort of apple cake this weekend.  This week has been a lot of work and and hopefully a fun weekend ahead.  My dad is coming to town!  There will be biking, sightseeing, kayaking and hopefully sunny days!  So, this is short and sweet.  I hope everyone has a great weekend!  Oh and about this granola.  It is gluten-free, pumpkiny, nutty and delicious!  Next time I will add more cinnamon.  Give it try, you will like it!  Oh and it is super easy.


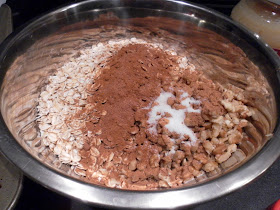
Dry ingredients all set.


Wet ingredients ready to go.


Let's just mix it all up.


By the way, you can totally share with a friend.  This granola would make a great little surprise for anyone. 

Gluten-free Pumpkin Granola: (adapted from With Style and Grace)
*makes approximately 8-9 cups of granola
4 cups gluten-free rolled oats (I used Trader Joe's brand)
1 cup walnuts
1/4 cup sunflower seeds toasted
1 teaspoon pumpkin pie spice
1 heaping teaspoon cinnamon
1/4 teaspoon nutmeg
3/4 teaspoon salt
1/2 cup brown sugar
1/2 cup canned pumpkin
1/3 cup unsweetened applesauce
2 tablespoons maple syrup
1 teaspoon vanilla extract
1 cup raisins

1.  Preheat oven to 325 degrees F.  Line two baking sheets with parchment paper and set aside.

2.  In a large mixing bowl, mix together gluten-free oats, chopped walnuts, toasted sunflower seeds, pumpkin pie spice, cinnamon, nutmeg and salt until well combined.

3.  In a separate mixing bowl, whisk together brown sugar, canned pumpkin, applesauce, maple syrup and vanilla extract until well combined.

4.  Add wet ingredients to dry ingredients in stages and using spatula fold and mix the wet into the dry ingredients until everything is coated.  If the mixture seems dry add extra applesauce, 1/4 cup at a time. 

5.  Spread the granola mixture onto prepared baking sheets.  Bake for 20-25 minutes.  Remove from oven and mix granola using spatula for more even baking and rotate pans.  Bake for an additional 18-20 minutes or until golden and crisp.

6.  Remove from the oven and let cool.  Stir in the raisins and store in an airtight container.  Enjoy!   


Monday, October 10, 2011

Gluten-Free Vanilla Cake with Pineapple Filling & Chocolate Buttercream


This past weekend was great!  Do you ever have one of those weekends that are just great because of the people you got to hangout with?  Well after the donut extravaganza that was Sunday morning; it was rounded out nicely with a walk through Eastern Market and even a fun trip to Costco.  Some friends can make the simplest arrands entertaining.  Then I came home and got to work on this cake.  Happy Birthday Michelle!  This cake is made from Pamela's Ultimate Classic Vanilla Cake Mix.  It is a gluten-free vanilla cake with pineapple filling and chocolate buttercream frosting.  I really do enjoy trying out new gluten-free products and GF recipes, because I like finding recipes that still taste like the original.  If you have any great recipes let me know!  This cake came out slightly fluffy with great texture, and the pineapple filling helped to keep it moist.  Next time, I will probably replace some of the water with pineapple juice to increase the pineapple flavor in hopes that it takes away the gluten-free taste a little bit.  The chocolate buttercream goes surprising well with cake and pineapple, so give it a try.  Enjoy!  


Ingredients...


All ready to go in the oven.


Gluten-Free Vanilla Layer Cake: (following Pamela's Ultimate recipe for fluffier cake)
1 package Pamella's Ultimate Vanilla Cake Mix
1 cup eggbeaters or 4 large eggs at room temperature
1/3 cup canola oil
2/3 cup water
1 teaspoon vanilla extract

1.  Preheat oven to 325 degrees F.  Grease and line two 8 inch cake pans with parchment paper.

2.  In a large mixing bowl, whisk together eggbeaters, oil, water and vanilla extract until well combined.  Whisk in cake mix just until combined.

3.  Divide batter between two prepared cake pans.  Bake for 25-30 minutes or until tooth pick inserted in the center comes out clean.  Let cool in pan for 5 to 10 minutes and then remove from pans and let finish cooling on cooling racks.  While cakes are cooling prepare, pineapple filling. 

Pineapple Filling
1 can crushed pineapple in pineapple juice
1 tablespoon water
2 teaspoons corn starch

1.  In a medium sauce pan, heat one can crushed pineapple in pineapple juice and 1 tablespoon water over medium heat, until heated through.  Whisk in 2 teaspoons corn starch until completely dissolved and remove from heat.  Let cool for approximately 5 minutes.  Then pour in blender and blend until smooth, with just a few chunks left.

2.  If cakes are not flat, pick one layer and using a serrated knife cut top off to make flat and remove parchment paper from bottom of cake.  This will be the bottom layer.

3.  Place bottom layer on cake stand and top with pineapple filling.  I generally fill to about 1/2 inch from the edge of the cake.  Remove parchment paper from second layer and place on top of pineapple filling.  Place in refrigerator until frosting is prepared.

Chocolate Buttercream Frosting: (from Magnolia Bakery)
1 1/2 cups (3 sticks) unsalted butter, softened
2 tablespoons milk
9 ounces semisweet chocolate, melted and cooled to lukewarm
1 teaspoon vanilla
2 cups powdered sugar

1.  Using a double boiler (I use a metal mixing bowl over a medium sauce pan filled 1/3 full of water) over medium-low heat, melt semi sweet chocolate.  Remove from heat and let cool to lukewarm or room temperature.

2.  In a large mixing bowl, using an electric mixer, beat butter until light and fluffy, approximately 1-2 minutes.

3.  Add in the milk and beat until well incorporated and smooth.

4.  Add the melted chocolate and beat until well combined.  Then add in the vanilla and beat until well combined. 

5.  On a lower speed, one cup at a time, beat in the powdered sugar until desired consistency.  This should turn out to be very light and fluffy and not too chocolaty.

6.  Remove cake from the refrigerator and carefully frost.  I place parchment paper under the edges of the cake to keep the cake stand surface clean.  Just gently pull these out when done frosting.  If you forget to remove them or they are sticking to the bottom of the cake, run a frosting spatula or knife between cake and parchment paper to help loosen the paper.   Serve and enjoy!

Sunday, October 9, 2011

Donuts, Donuts, Donuts!


Let me lay this weekend out.  It all started with apple picking and a picnic.  Then there was a night of dancing to every dumb pop song that is currently being played over and over on the radio. For this very specific night out, I was told its okay to kiss a random boy, because "random boys are sort of like eating a cupcake. you feel guilty for like a minute, then you're just happy you let yourself go ahead and enjoy it.  Like "I'll work out later.  Right now I'm gonna eat every crumb of this cupcake and love it."" Thank you Meghan for these very true words; I did not however kiss said random boy.  But I did make donuts with my good friend Stephanie. 

Let me tell you this weekend was planned in advance, like 3 weeks ago.  There was strategizing involved, and a sleepover, so that these donuts could be made first thing Sunday morning.  Okay so there are three kinds, THREE!  In no special order... Plain Cake Donuts with Chocolate Glaze...Baked Apple Donuts with Cinnamon Sugar....Pumpkin Donuts with Maple Glaze.  Yum!  Oh and P.S. Stephanie and I hand picked these apples, so be ready for more apple deliciousness in the next couple of weeks.  (Pics from our apple picking adventure)  All three kinds are baked, which makes them slightly healthier and they are delicious!  Oh and did I mention they are dairy free, but I have included recipes for dairy-free and with dairy!  FYI making donuts always seemed very intimidating, but these are so easy!  I promise, once you have the pan you will want to make all kinds of donuts. 

Its fall, so go apple picking, have a picnic, get outside, because soon, very soon, all you will want to do it curl up on a couch, preferably next to a fire, and drink hot cider...well and maybe make donuts. 


Fill plain donut batter about half full.


This was the first batch and let me tell you we were like small children.  OMG, so apparently Stephanie and I had the very same first cookbook!  


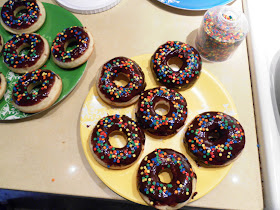
So pretty with yummy chocolaty glaze.


Fill donut pan with baked apple batter till mostly full.


Yum, baked apple donuts covered in cinnamon and sugar.  What doesn't taste better coated in cinnamon and sugar?


Fill donut pan with pumpkin batter till full, but not overflowing.


Thanks Stephanie for the beautiful glazing job!


These and the baked apple donuts will make your house smell amazing. Promise


Cake Donuts with Chocolate Glaze: (from Sur La Table)
*makes approximately 12 donuts
1 1/4 cups all purpose flour
1/2 cup sugar
1 1/4 teaspoons baking powder
1/8 teaspoon ground nutmeg
3/4 teaspoon salt
1/4 cup eggbeaters or 1 large egg
1 1/2 teaspoons earth balance or 1 1/2 teaspoons unsalted butter, melted
1/2 cup soy milk with 1 1/2 teaspoons apple cider vinegar or 1/2 cup buttermilk

1.  Preheat oven to 425 degrees F.  Spray donut pan with non-stick cooking spray.

2.  In a medium sized mixing bowl, whisk together flour, sugar, baking powder, nutmeg and salt.

3.  In a large mixing bowl, whisk together butter and egg until well combined.

4.  Add the flour and milk to the to the wet ingredients, alternating between flour and milk, mixing between the addition of each.  Begin and end with the flour mixture.

5.  Using a spoon, carefully spoon batter into prepared donut pan, filling cups approximately half full. 

6.  Bake for 4 to 6 minutes or until the top of donuts spring back when touched. Remove from oven and let cool in pan for 4 to 5 minutes before removing from pan.  Prepare chocolate glaze while donuts are cooling in pan.

Chocolate Glaze:
1/4 cup semi sweet chocolate chips
1 tablespoon earth balance or unsalted butter
1 tablespoon light corn syrup
1 teaspoon hot water

1.  In a medium microwave safe bowl, microwave chocolate chips, butter and corn syrup on 50% power for one minute, stirring frequently until completely melted. 

2.  Stir in 1 teaspoon water until the glaze is thick and smooth.  If glaze is too thick add another teaspoon hot water.

3.  Dunk donuts in the glaze and sprinkle with sprinkles.  Enjoy!


Baked Apple Donuts with Cinnamon and Sugar: (adapted from Shutterbean.com)
*makes approximately 18 donuts
1 1/4 cups flour
2 teaspoons baking powder
1 teaspoon ground cinnamon
1/8 teaspoon ground nutmeg
1/2 teaspoon salt
1/2 cup canola oil
1/2 cup packed light brown sugar
1/2 cup sugar
1/2 cup eggbeaters or 2 eggs, at room temperature
2 teaspoons vanilla extract
3 medium apples, peeled and shredded

Cinnamon Sugar Coating:
1 1/2 teaspoon earth balance or unsalted butter
2 teaspoons ground cinnamon
2 tablespoons sugar

1.  Preheat oven to 350 degrees F.  Spray donut pan with non-stick cooking spray.

2.  In a medium sized mixing bowl, whisk together flour, baking powder, cinnamon, nutmeg and salt.

3.  In a large sized mixing bowl, whisk together canola oil and sugars until well combined.  Whisk in the eggbeaters and vanilla extract. 

4.  Whisk the dry ingredients into the wet ingredients just until combined.  Then gently whisk in apples with any juice.

5.  Using a spoon, carefully spoon batter in to prepared baking pan until almost full.  Bake for approximately 16 to 20 minutes or until golden and a tooth pick inserted comes out clean.

6.  Remove from pan and let cool for 3 to 5 minutes.  While cooling, in a microwave safe bowl, melt 1 1/2 teaspoon earth balance and in a seperate bowl, large enough to dunk the donuts in, combine cinnamon and sugar.
7.  Dunk each donut in the melted butter and then in the cinnamon-sugar mixture.  Enjoy!


Pumpkin Donuts with Maple Glaze: (adapted from Blue Eyed Bakers)
*makes approximately 10-12 donuts
1 3/4 cups flour
1 1/2 teaspoons baking powder
1 teaspoon cinnamon
1/2 teaspoon nutmeg
1/2 teaspoon allspice
1/8 teaspoons ground cloves
1/2 teaspoon salt
1/3 cup vegetable oil
1/2 cup brown sugar
1 egg
1 1/2 teaspoon vanilla extract
3/4 cup canned pumpkin
1/2 cup milk

1.  Preheat oven to 350 degrees F.  Spray donut pans with non-stick cooking spray.

2.  In a medium sized mixing bowl, whisk together the flour, baking powder, cinnamon, nutmeg, allspice, cloves and salt. 

3.  In a large mixing bowl, whisk together the oil and brown sugar until well combined.  Whisk in eggbeaters and vanilla extract.

4.  Add the flour mixture and soy milk to the wet ingredients, alternating between flour and soy milk, mixing between the addition of each.  Begin and end with the flour mixture.  Whisk in the canned pumpkin just until combined. 

5.  Using a spoon, carefully spoon batter in to prepared baking pan until full, but not overflowing.  Bake for approximately 8 to 9 minutes or until golden and a tooth pick inserted comes out clean.  Remove from pan and let cool.  While donuts are cooling prepare maple glaze.

Maple Glaze:
1/2 cup powdered sugar
2 tablespoons pure maple syrup
1 tablespoon water

1.  In a small mixing bowl, whisk together all three ingredients until well combined.  If glaze appears too thick, add 1 teaspoon of water at a time until desired consistency. 

2.  Either dunk donuts in glaze or using a fork drizzle donuts with glaze.  Enjoy!

Sunday, October 2, 2011

Fall: Pumpkin Maple Leaf Sandwich Cookies...a cookie in a cookie


It is officially fall in D.C. the temperature has dropped, the leaves are starting to fall and canned pumpkin is finally on the shelves.  Fall, when you can finally run outside and breath...you hear the crunch of leaves below your feet...and there are those nights where a jacket is the perfect accessory. 

This weekend, although cold and rainy, was a blast.  There was craft fair...yay Craft Bastards!  Just picture a craft fair that is the best of Etsy...aka amazing.  Then there was a delicious pasta dinner and a movie with a great friend.  Thank you again for the tasty dinner Stephanie!  Then there was my second triathlon relay of the season.  Well Stephanie and Clare, the cold and the rain didn't stop us, we kicked some butt and got first place in the female relay.  Then to finish off the weekend I thought it was time to bring out the pumpkin and make some cookies to send to Meghan in Birmingham.  

So, what cookies with pumpkin you may ask.  Take one half of a Trader Joe's Maple Leaf Cookie, wrap it in pumpkin cookie dough and bake.  The result a cookie in a cookie.  These cookies are delicious.  The pumpkin cookie portion is a light and fluffy and the maple leaf cookie softens just a bit inside.  If I could bottle the smell that is a result of baking these I would.  Think pumpkin, maple, cinnamon, cloves and nutmeg.  These are the kind of cookies that make you feel warm and fuzzy inside.  Yum!  Make these, they will not disappoint. 


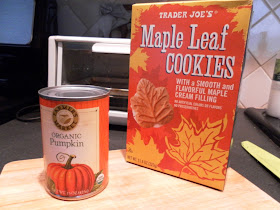
Officially pumpkin time!  P.S. these maple leaf cookies are amazing.  Whats makes them better?...


...wrapping them in pumpkin cookie dough. 


anddd these are my tiny hands, please ignore how crazy small they are and pay attention to the cookies.  Place one scoop of dough in floured hand and press sandwich cookie half on top of dough.  Cover with another scoop of dough and form around cookie.


Pumpkin Maple Leaf Sandwich Cookies:
1 stick (1/2 cup) butter, softened
1 cup white sugar
1/2 cup brown sugar
1 1/4 cup canned pumpkin
1 egg or 1/4 cup egg beaters
1 1/2 teaspoons vanilla extract
2 1/2 cups all-purpose flour
1 teaspoon baking powder
1 teaspoon baking soda
2 1/2 teaspoons ground cinnamon
1/2 teaspoon ground nutmeg
1/2 teaspoon ground cloves
1/2 teaspoon salt

1.  In a large mixing bowl, cream together butter and sugars.

2.  Whisk in vanilla and eggs until well combined.  Whisk in pumpkin.

3.  In a separate mixing bowl, whisk together flour, baking powder, baking soda, cinnamon, nutmeg, cloves and salt.

4.  Whisk dry ingredients in to wet ingredients in two batches.  Place cookie dough in refrigerator for 45 minutes to an hour.

5.  Take one box maple sandwich cookies, preferably Trader Joe's Maple Leaf Sandwich cookies.  Cut approximately 11-12 cookies in half diagonally (see picture above).

6.  Preheat oven to 350 degrees F.  Line a cookie sheet with parchment paper.

7.  Using a cookie scoop or tablespoon, scoop one tablepoon of cookie dough in to floured hand.  Place one half of a sandwich cookie in hand.  Place another scoop of cookie dough on top of sandwich cookie and form around sandwich cookie.

8.  Place on prepared cookie sheet and bake for 12-13 minutes.  Remove from oven and let cool on cookie sheet for one minute, then move to cooling rack to finish cooling.  Serve and enjoy!